Maya Material Manager
Why Need
Last year when I worked on two NPR projects, 3D artists there used Maya as the modelling tool. The NPR shading has a strict standard on the mesh, for example the normal direction of the mesh was sophisticated manipulated so that the edge of the cartoon shadow would be nice and clean. Artists need to revise frequently in maya scene, and there are usually many sets of the same model, for example one character will have FPS and TPS version, or version for film and in game, besides the game was in early developing stage, revising the whole design of any character usually happens.
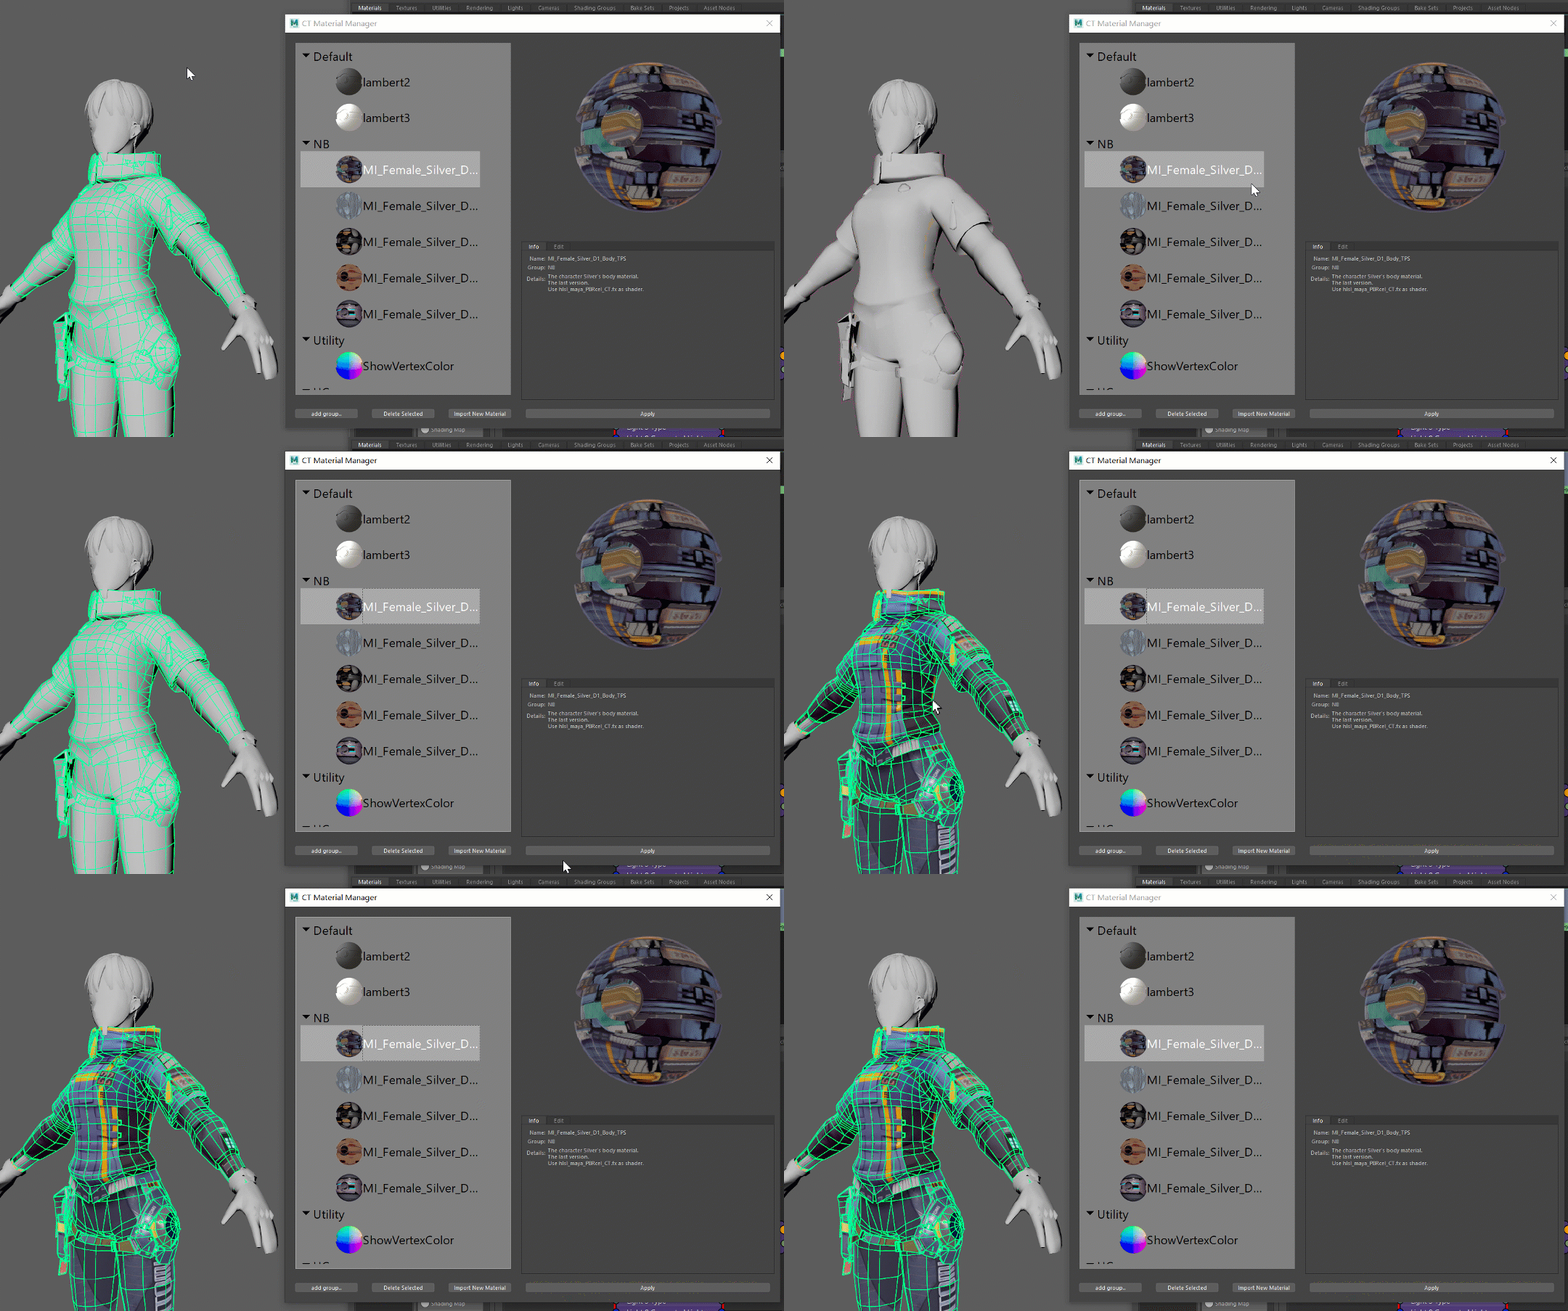
In this circumstances, this is what you will see in their maya file:
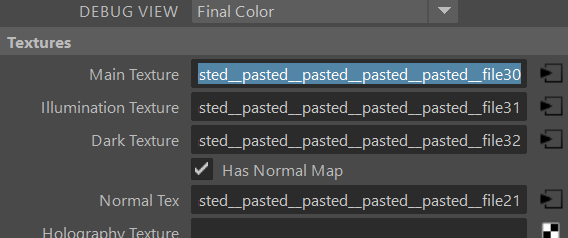
Every time, if an artist want to get a material of a previous character, they need to find that maya file, open that scene, open the hypershade, copy that network to the target maya scene, and every pasted node will be pasted_pasted_pasted…:sweat_smile:
For myself, I also get tired of assigning a same material repeatedly when I get a new scene, especially when you need to assign about 6 textures… So here it is, I want to make a material manager that can cross different maya sessions. Free to save and apply materials there, and share your saved material to others.
Design of the UI
The Draft
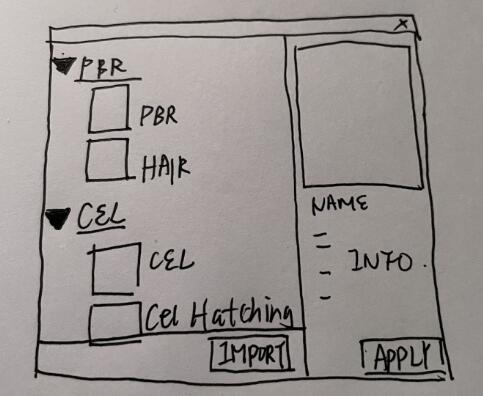
Before starting, I drew a quick draft of the expecting UI. :speak_no_evil:
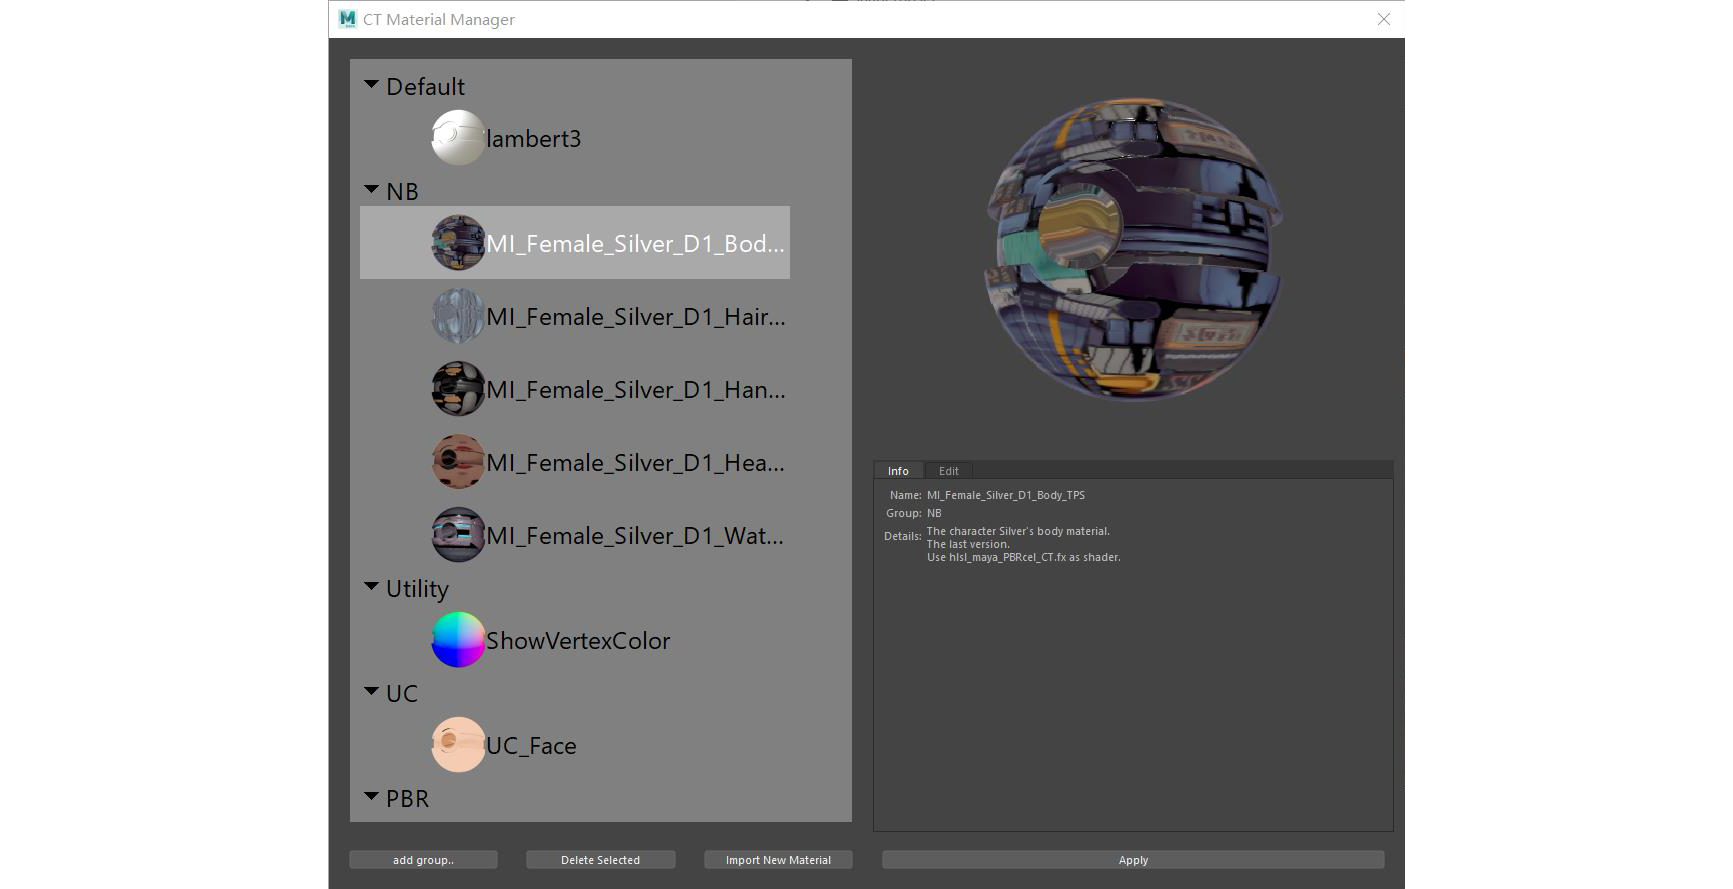
Generally, the left panel is the list of the saved material, the right panel is the image, name and information of the currently selected material, and the bottom, with two main functions, import and apply.
PyQt
I used PyQt to write the UI. The left side is a tree widget.
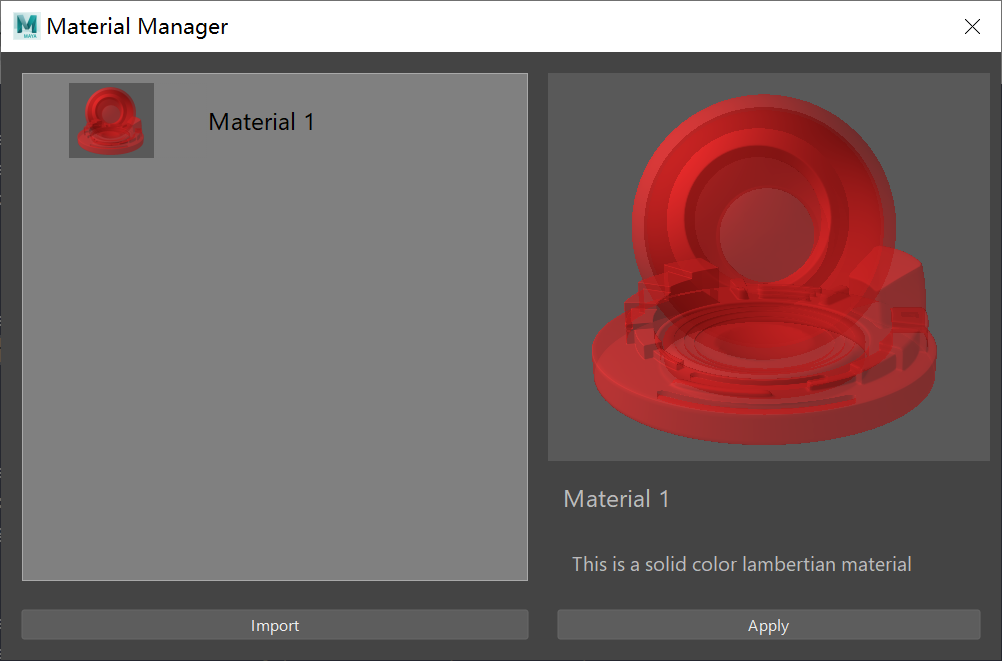
Then added two panels at the right side so that one panel is displaying another one is editing. 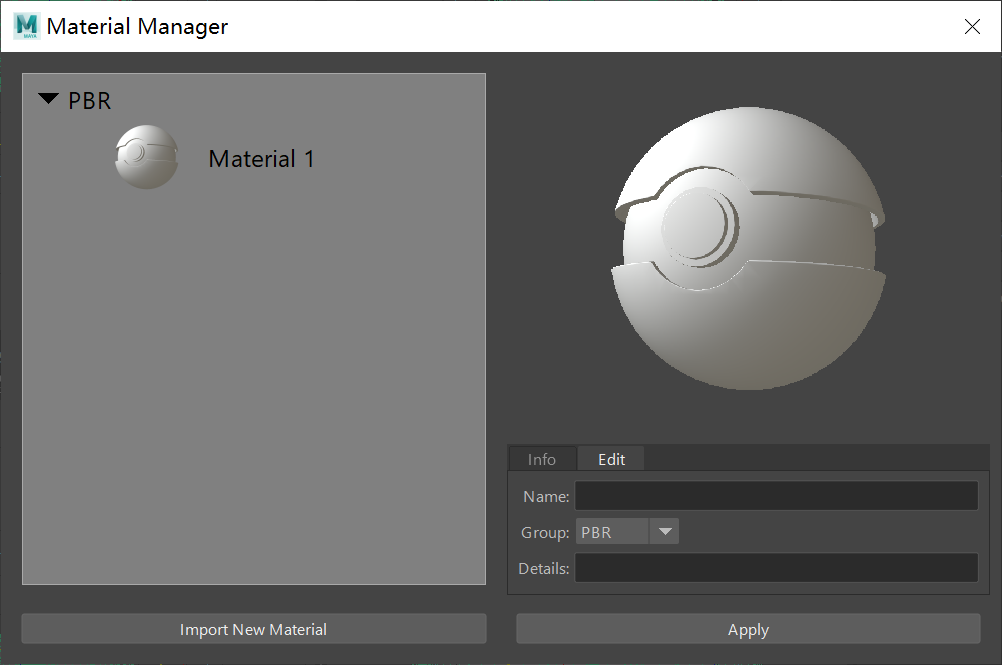
Then added the group button and group widget:
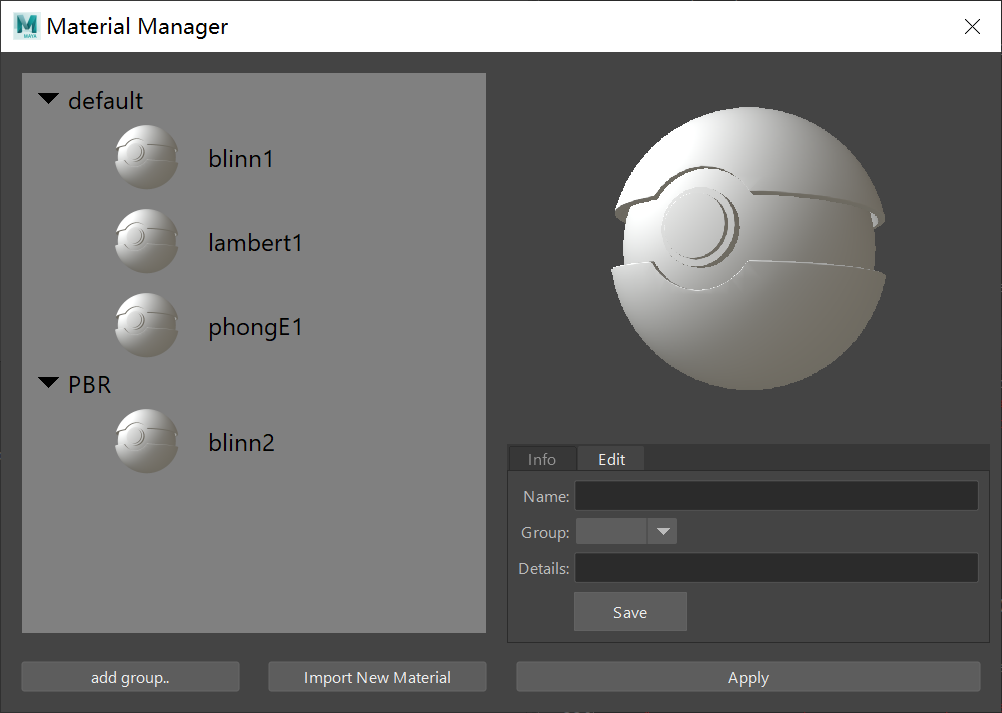
So far, the UI is almost there.
Create the Shaderball Image
def create_image(self, material_folder, directory=DIRECTORY):
    view = mel.eval("string $null = $gShaderBallEditor")

    cmds.modelEditor(view, e=True, acg= directory + '/ShaderBall_my.obj')
    cmds.modelEditor(view, e=True, rcc =True)
    cmds.modelEditor(view, e=True, capture=material_folder + '/image.png')

    return os.path.join(material_folder + '/image.png')
I called the window gShaderBallEditor, which is the material viewport of the Hypershade, and substituted the mesh to my own /ShaderBall_my.obj, and then took a capture of it. However, I met a tricky problem which was, that when I clicked the import button, the saved image won’t show in the panel, but if I continued importing another material, the image of the last material would show. Firstly I guess it was because the refresh function was called when I import a new material, but it doesn’t make sense as I called the same refresh function right away after importing the current material.
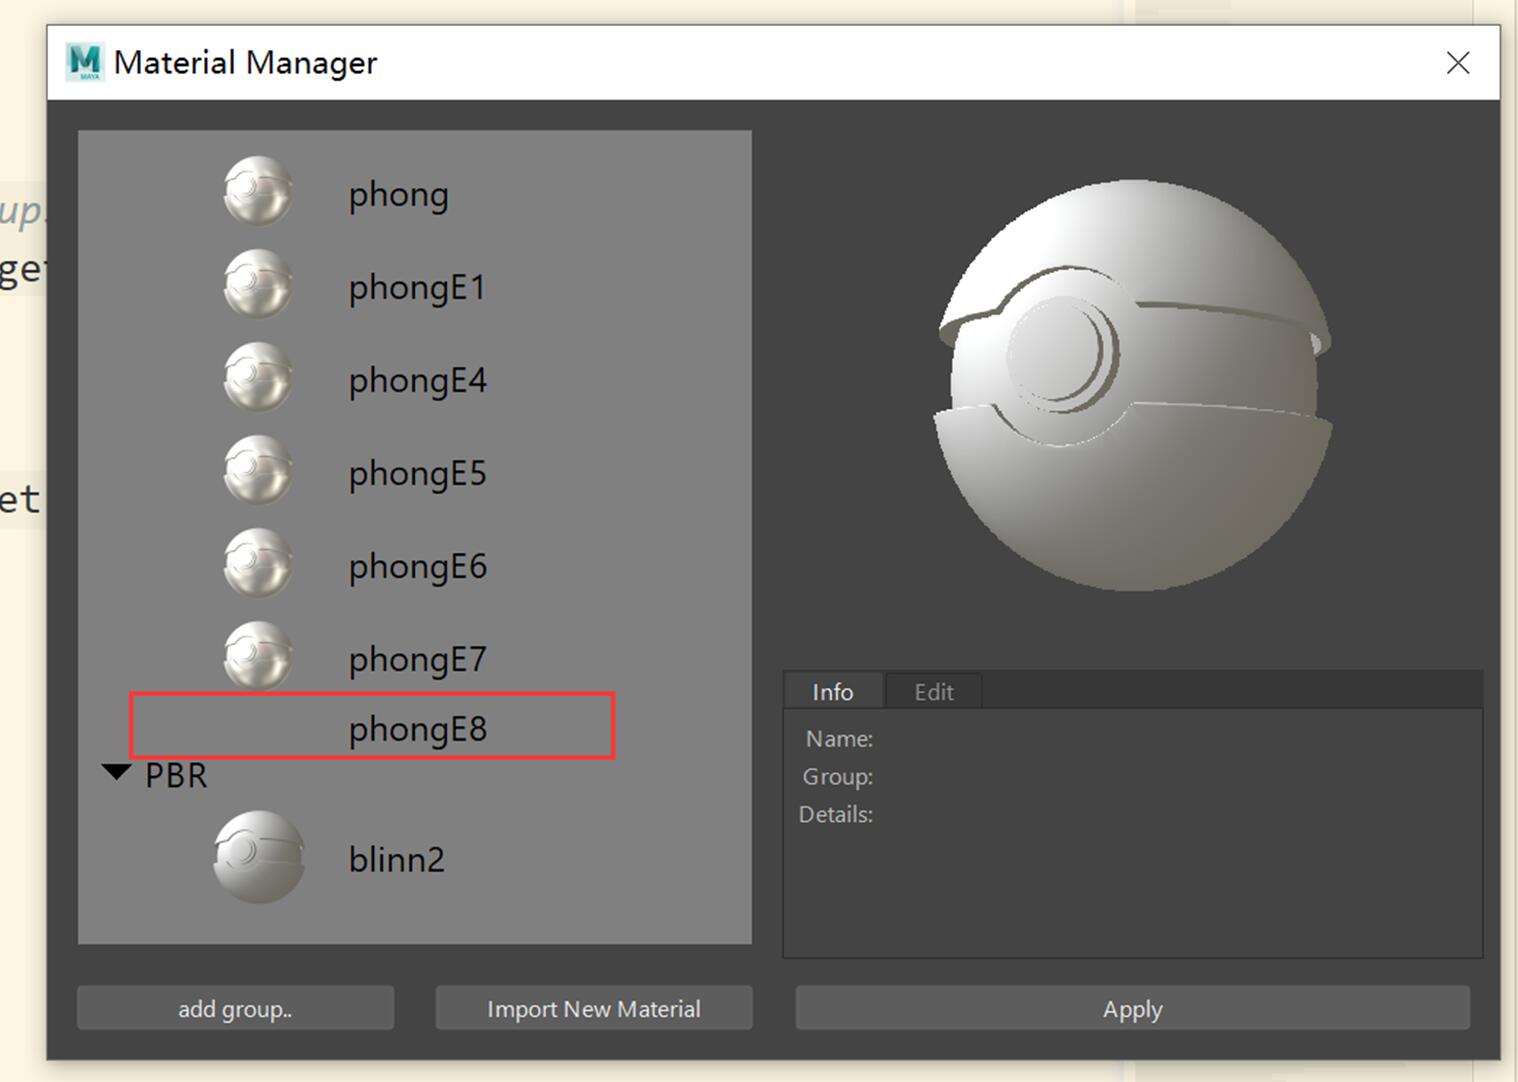
So I was considering, that it might be when Maya was trying to grab the image, there was no image existing. Why? I asked a senior TD, he told me it might be there are two threads. One is the main thread, Maya, and another one is the Hypershade Material Viewport thread, when the import function is executed, the createImage function and grabImage function are called at the same time, but in reality, there are millisecond differences between each other, that’s why Maya grab nothing.
QThread
Thus, to solve this problem, I need to make Maya thread wait for the Hypershade thread, and once the Hypershade thread finishes (once detected the image file generated in the directory) it emits a signal to the main thread, then Maya grabs the image.
- import
QThread - check if the image file is already exist, if does, emit the signal.
    class CheckFileExists(QObject):
        exist_signal = Signal()
        def __init__(self,path):
            super(CheckFileExists, self).__init__()
            self.path = path

        def work(self):
            for i in xrange(2):
                time.sleep(1)
                if os.path.exists(self.path) and os.path.getsize(self.path) > 0:
                    self.exist_signal.emit()
                    break
- in import material function, add:
    self.thread = QThread()
    self.worker = saveData.CheckFileExists(image_path)
    self.worker.moveToThread(self.thread)
    self.thread.started.connect(self.worker.work)
    self.worker.exist_signal.connect(self.thread.quit) #quit .CheckFileExists()
    self.worker.exist_signal.connect(self.refresh_tree)
    self.thread.start()
Design of the Data Structure
Now the tricky part, how should I organize the data structure? The data structure decides how I record and how I organize the data I collect, and that should corresponding with the tree widget structure.
Tree Widget

This is the tree widget structrue of my material list, and that matches with the directory structure below.
Directory Structure
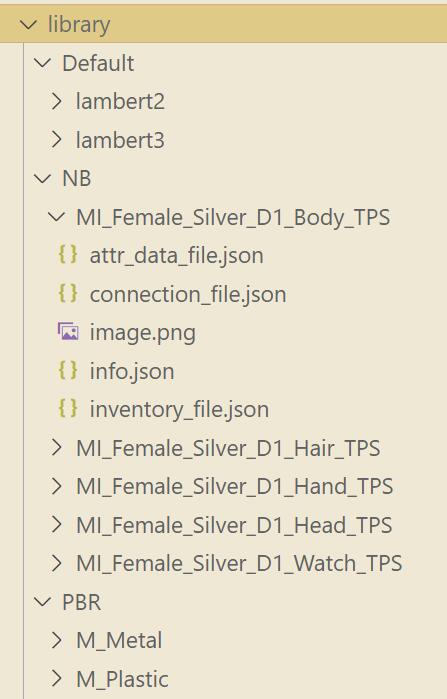
Under the library, is the groups folder, under each group folder, are json files and the image of the material. So that if I change the directory structure such as changing a material’s group, I can just do shutil.copytree() and shutil.rmtree() operations. Or delete a material or group, just delete the target folders. Then refresh the tree widget by walking through the folders again.
Tree Widget setData()
In QTreeWidgetItem Class, use setData() to save data into the item.
self.tree_widget_item.setData(1, QtCore.Qt.UserRole + 1, mat)Where, mat is the data I gonna save, which is the list mat_info below :point_down::
mat_info['material_name'] = mat_folder
mat_info['group'] = group_name
mat_info['material_path'] = directory + '/' + group_name + '/' + mat_folder
mat_info['library_path'] = directory + '/'
mat_info['group_path'] = directory + '/' + group_name + '/'
mat_info['json_path'] = json_path
mat_info['attr_data_file_path'] = attr_data_file_path
mat_info['inventory_file_path'] = inventory_file_path
mat_info['connection_file_path'] = connection_file_path
mat_info['image_path'] = image_path
self.all_dict_by_groups[group_name].append(mat_info)
And you can retrieve data by using the following steps:
def get_current_item_data(self):
    self.current_item_data = None
    if self.main_tree_widget.currentItem():
        self.current_item_data = self.main_tree_widget.currentItem().data(0, QtCore.Qt.UserRole + 1)\
                            or self.main_tree_widget.currentItem().data(1, QtCore.Qt.UserRole + 1)\
                            or None
For example, self.current_item_data["material_path"] will return me the current clicked material’s directory path.
How to Save the Hypershade Network?
This is the most tricky part of the tool. There are three parts of it:
- Get the material’s attributes, basically are scalar attributes. If it’s a custom shader, get the shader file path, which is also attribute type.
- Get the connections. For example, if the material has a texture, it will connect with a
filenode and ap2dnode.
In the past, I’ve usually written a short script that can help artists to assign the material with one click, so that they do not need to assign some fixed textures such as cubemaps. While this time, considering it is a generic tool, I don’t know what kind of material users would save, and what attributes the shader has, it definitely needs to find a pattern of the possible materials.
Find Material Attributes and Connections
The overall idea is
- find all the node types used
- find all the attributes of each node
- find all the connection details of each node
so later on the data can be used to recreate each node, assign the attributes, connect the expected nodes.
This step is done by an iteration function.
def list_data(input_nodes,attr_data,connections,inventory,index=0):
    black_list = ["colorManagementGlobals"]
    for input_node in input_nodes:
        node_type = cmds.nodeType(input_node)
        if node_type not in black_list:
            attrs = cmds.listAttr(input_node)
            data = {"nodeType":node_type,"nodeName":input_node,"data":{},"index":index}
            next_nodes = []
            if node_type not in inventory.keys():
                inventory[node_type] = [0,[],index]
            inventory[node_type][0] = inventory[node_type][0] + 1
            inventory[node_type][1].append(input_node)
            inventory[node_type][2] = index
            index += 1
            for attr in attrs:
                try:
                    connected = cmds.listConnections("{}.{}".format(input_node,attr),p=True,s=True,d=False)
                    data["data"][attr] = None
                    if connected:
                        connect_data = {
                            "left_node_name":connected[0].split(".")[0],
                            "left_node_attr":connected[0].split(".")[-1],
                            "left_node_type":cmds.nodeType(connected[0]),
                            "right_node_name":input_node,
                            "right_node_attr":attr,
                            "right_node_type":node_type
                        }
                        if connect_data["left_node_type"] not in black_list:
                            connections.append(connect_data)
                        next_nodes.append(connected[0].split(".")[0])
                    if not connected:
                        data["data"][attr] = cmds.getAttr("{}.{}".format(input_node,attr))

                except:
                    pass
            if not data["data"] == {}:
                attr_data[input_node] = data
            next_nodes = list(set(next_nodes))

            if next_nodes:
                list_data(next_nodes,attr_data,connections,inventory,index)
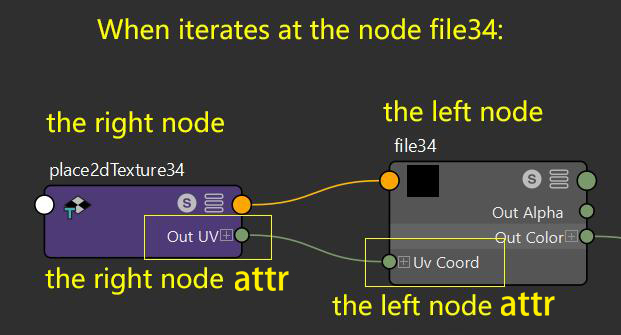
The iteration started at the material you selected, and iterated to the sublevel nodes until finished. In the process of iteration, once it is a new node and not on the blacklist, I will collect all the attributes, and find which one is connected, which one is just number.
For attributes, just save them in attr_data dictionary. For connected nodes, I recorded the connection information by labelling who is in what direction, and split the node name and attribute name, for the following using. The data is like:
...
    {
        "left_node_attr": "outColor",
        "right_node_name": "dx11Shader2",
        "right_node_type": "dx11Shader",
        "right_node_attr": "CubeMap",
        "left_node_name": "file25",
        "left_node_type": "file"
    },
...
#cmds.connectAttr('file25.outColor', 'dx11Shader2.CubeMap', f= True)
I also created an inventory dictionary that records the node that needs to be created when applying the material. It includes the node type, amount of the node type, the instance name of the node type, and index of the node. Like below:
"place2dTexture": [
        4,
        [
            "place2dTexture8",
            "place2dTexture7",
            "place2dTexture6",
            "place2dTexture5"
        ],
        6
    ]
The shader type node will be given index 0, which is important when creating a node because you need to create a shader first then you can assign other connections to it, otherwise it will show key errors.
How to Build the Hypershade Network from Saved Data?
Now I have data saved in json files of the directory, it’s easy to build the network based on that.
Get Material Attributes
...
for data in attr_data.keys():
        for attr in attr_data[data]["data"].keys():
            if attr == "shader":
                try:

                    pmc.setAttr("{}.{}".format(relationship[data],attr),attr_data[data]["data"][attr])
                except:
                    pass
...
Get Material Connections
...
for connect in connections:
        try:
            try:
                cmds.connectAttr("{}.{}".format(relationship[connect["left_node_name"]],connect["left_node_attr"]),"{}.{}".format(relationship[connect["right_node_name"]],connect["right_node_attr"]),f=True)
            except:
                cmds.connectAttr("{}.{}".format(relationship[connect["right_node_name"]],connect["right_node_attr"]),"{}.{}".format(relationship[connect["left_node_name"]],connect["left_node_attr"]),f=True)
            print('connect:'+"{}.{}".format(relationship[connect["left_node_name"]],connect["left_node_attr"]))
        except:
            pass
...
Assign the Material
If I click the Apply button, and if I select any mesh, the material will be created and assign on the mesh, otherwise it will appear in the hypershade without assignment.
